

Wooden frame with two flaps of cloth
- One small button frame
Introduction
Invite a child to come by telling them you have something to show them. Have the child bring the appropriate dressing frame and have them place it on a specific spot on the table you will be working at. Have the child sit down first, and then you sit down. Tell the child that you will be showing him how unbutton and button. Give the names of each part.
Unbuttoning
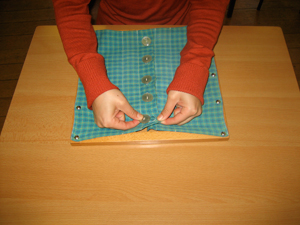
Place the frame so the buttonhole is on the right and start with the top button to work your way down.
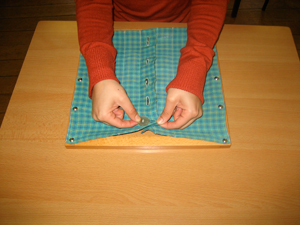
- Pinch the right side of the button with your right thumb and index finger.
- Pinch the material directly to the left side of the button with your left thumb and index finger.
- Pull the material to the left to create a hole.
- Tilt the button down to the left.
- Begin to slide button through the buttonhole.
- Unpinch your left fingers.
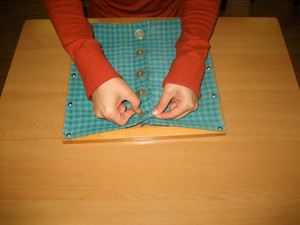
- Pinch the left side of the button that is through the buttonhole with your left thumb and index finger.
- Unpinch your right fingers and pinch the material.
- Rotate the material to the right to allow the button to completely go through the buttonhole.
- Pause to allow the child to see that the button is now “free”.
- Unpinch your left fingers.
- Gently place the material down on top of the button and remove your right fingers.
- Repeat for the other four buttons.
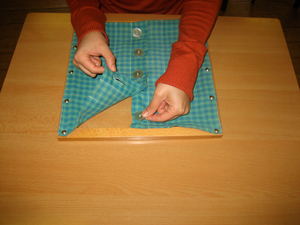
- Open the right flap fully and then the left.
- Close the flaps starting with the left flap and then the right.
Buttoning
Start with the top button
- Pinch the left side of the button with your left thumb and index finger.
- Pinch the material to the direct left of the buttonhole with your right thumb and index finger.
- Slide the button half way through the buttonhole.
- Unpinch the material with your right fingers
- Pinch the right side of the button that is coming through the hole.
- Unpinch your left fingers.
- Pinch the material left of the buttonhole.
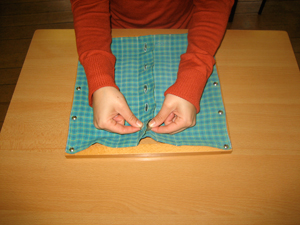
- Pull the material to the left and pull the button to the right until it is fully though the hole
- Remove your left fingers and then your right.
- Repeat for the other four buttons
Once done, offer the child the opportunity to unbutton and button the buttons.
Direct: To help them learn how to unbutton and button themselves.
Indirect: Acquiring coordination of movement.
Pulling the button through the button hole to finish the buttoning.
2 1/2 - 3 1/2years
You may want to ask the child where he has seen a button before to have him associate what he is about to do to his every day clothing.